Let’s discuss the question: how to draw rope in inventor. We summarize all relevant answers in section Q&A of website Achievetampabay.org in category: Blog Finance. See more related questions in the comments below.

How do you make a drawing in Inventor?
In a part or assembly file (assembly not available in Inventor LT): Right-click the file name in the browser, select Create Drawing View. The Create New File dialog box displays. To open the standard. idw (Use Template), click Create.
How do you use tubing in Inventor?
- With an assembly file open, click Environments tab Begin panel Tube and Pipe .
- In the Model browser or graphics window, right-click the blank area and select Create Pipe Run. …
- Do either of the following: …
- Click OK to close the dialog box.
Autodesk Inventor Simple Rope and Pulley Tutorial
Images related to the topicAutodesk Inventor Simple Rope and Pulley Tutorial
How do I create a new drawing template in Inventor?
- Click File New, select an . …
- Customize settings in the Tools tab Options panel Document Settings dialog.
- Customize drawing resources by creating custom drawing borders, title blocks, sheet formats, or sketch symbols, or by copying drawing resources from another file.
How do you shade a drawing in Inventor?
On drawing mode, select the Base View and place the view onto the sheet. Using the Overlay view, click on the original base view and then choose new View Representation from the pop-up window. Press the button the Shaded for the shaded effect.
What is AutoCAD for electrical?
AutoCAD Electrical is the software of the AutoCAD suite which is intended to help control designers with the creation and modification of control systems. This software has extended features to automate control engineering tasks, such as building circuits, numbering wires, and creating bills.
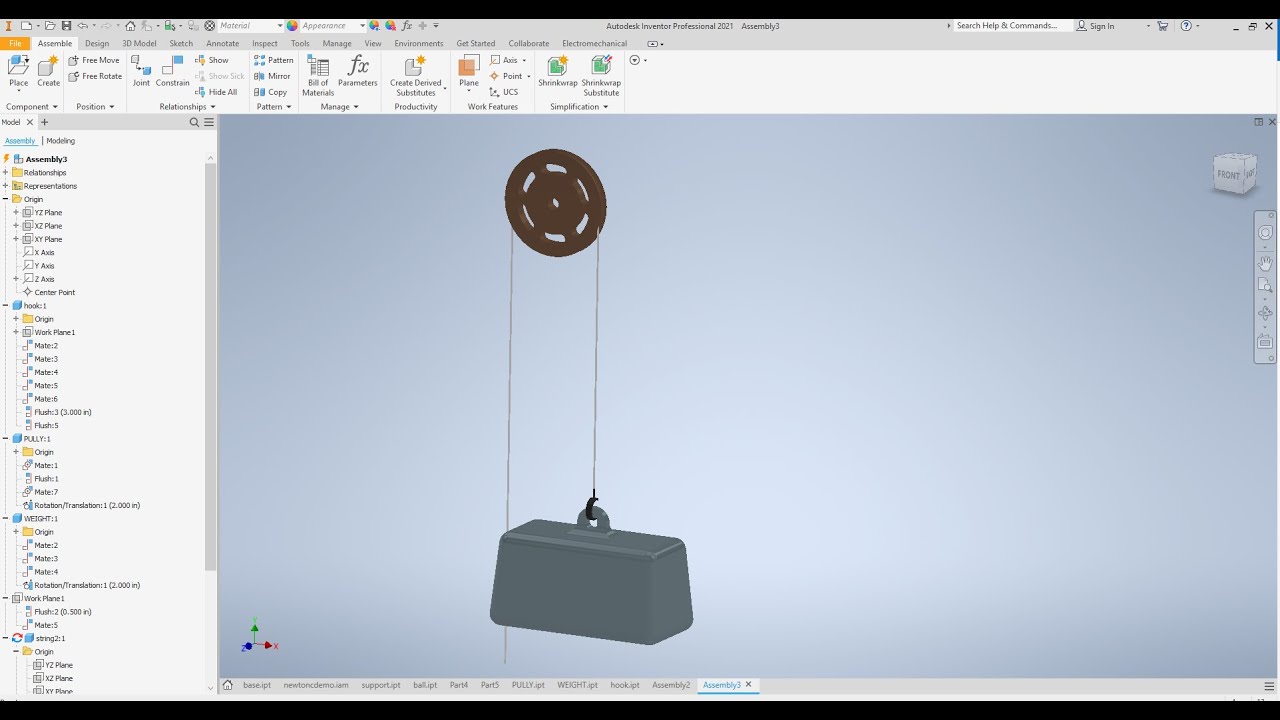
AutoDesk Inventor 2021 Creating a String Pulley Assembly Tutorial
Images related to the topicAutoDesk Inventor 2021 Creating a String Pulley Assembly Tutorial
How do you sweep in AutoCAD?
- Create a circle at the endpoint of the object, as shown below:
- Select the Sweepicon from the ribbon panel, as shown below: …
- Select the object to Sweep. …
- Press Enter.
- Select the sweep path. …
- Press Enter.
- The sweep will be created, as shown below:
How do you make hoses in Inventor?
- In the browser, activate the run to contain the new route.
- With a two-fitting style active, click Pipe Run tab Route panel New Route .
- In the Create New Hose dialog box, provide a name and location for the hose subassembly file and click OK.
How do you create a tube and pipe in Inventor?
- Activate a Tube & Pipe Runs assembly, pipe run, or route.
- Activate the Tube & Pipe Styles tool.
- In the Tube & Pipe Styles dialog box, on any of the tabs, select a style from the Style list to use as the basis for the new style.
- Click New.
Inventor 2018 – Tutorial 18: Modelling a Wire Rope
Images related to the topicInventor 2018 – Tutorial 18: Modelling a Wire Rope

How do you make a wire harness in Inventor?
- In an Autodesk Inventor assembly, click Environments > Begin > Cable and Harness. …
- Click OK on Create Harness window to close it. …
- Under Cable and Harness, you can create Cables, Wires, Segments, Splices, Ribbon Cables, and Folds (on Ribbon Cables).
What is a CAD drawing program?
What is a CAD drawing? A CAD drawing is a detailed 2D or 3D illustration displaying the components of an engineering or architectural project. Computer-aided design utilizes software to create drawings to be used throughout the entire process of a design project, from conceptual design to construction or assembly.
Related searches
- how to make a pulley on inventor
- autodesk inventor rope pulley
- how to make a flexible cable in inventor
- how to draw a balloon easy step by step
- twisted pair
- inventor adaptive 3d sketch
- Inventor pipe routing
- how to draw a purse step by step
- how to draw bag step by step
- inventor pipe routing
- how was rope invented
- how to draw rope easy
- how to draw rope step by step
- how to draw a bag easy step by step
- how to draw a cowboy rope
- how to draw a hanging rope
- how to draw a money bag step by step
Information related to the topic how to draw rope in inventor
Here are the search results of the thread how to draw rope in inventor from Bing. You can read more if you want.
You have just come across an article on the topic how to draw rope in inventor. If you found this article useful, please share it. Thank you very much.