Let’s discuss the question: how to make a spring in inventor. We summarize all relevant answers in section Q&A of website Achievetampabay.org in category: Blog Finance. See more related questions in the comments below.
How do you create a spring in Inventor?
To start creating the spring, on the Create panel click Coil button. After clicking the coil command, it will open a feature box and bring you to the Coil Shape tab. It should automatically with the circle as its profile. Now you need to select the Y axis for the coil to revolve around.
How do you make a spring in Inventor 2020?
…
Create a Coil Spring
- Join . Adds the volume created by the lofted feature to another feature or body.
- Cut . …
- Intersect . …
- New Solid .
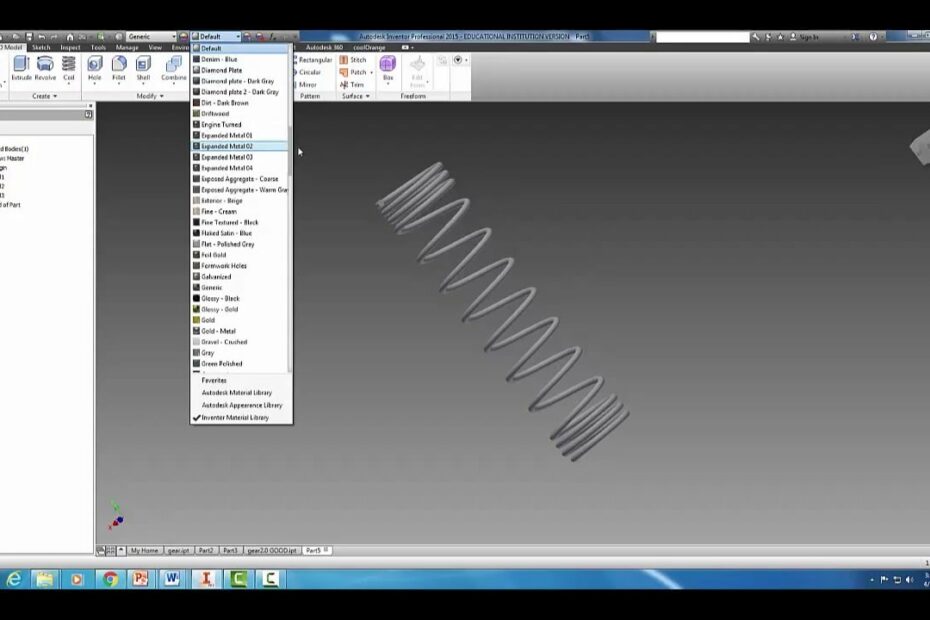
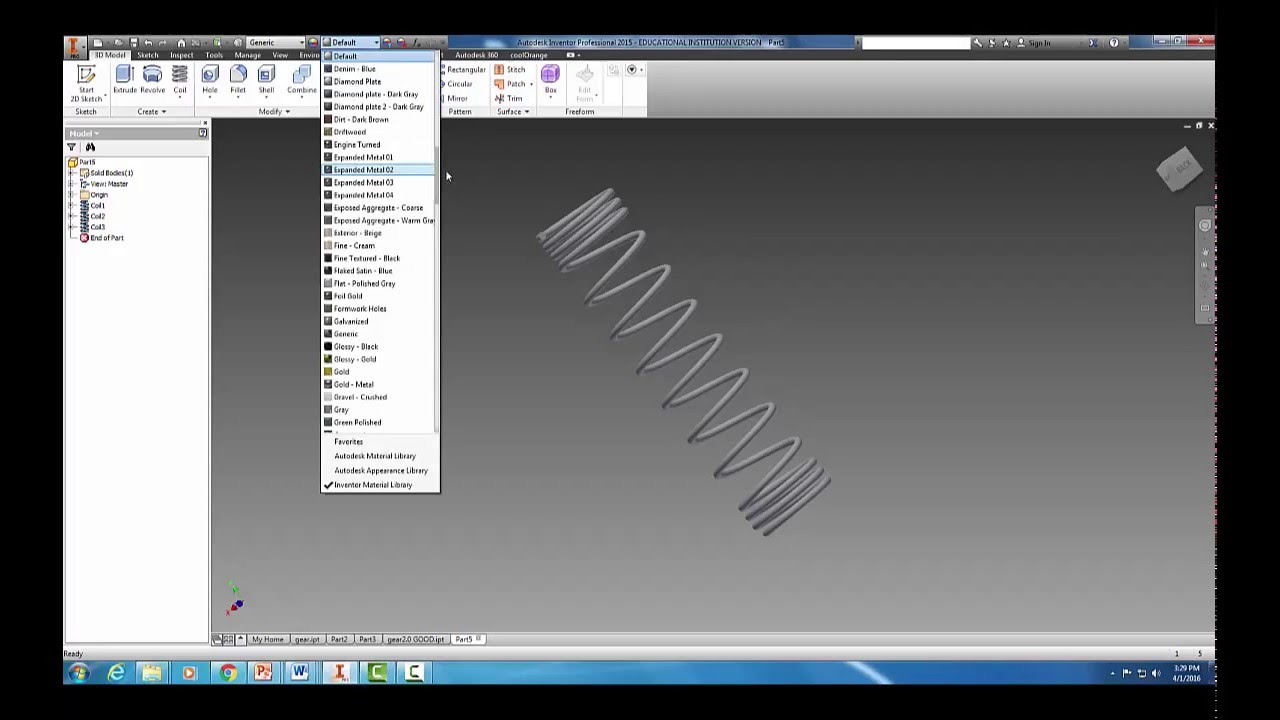
Creating a Spring in Autodesk Inventor
Images related to the topicCreating a Spring in Autodesk Inventor
How do you make a spring in Inventor 2021?
- Select a part face or workplane for the sketch. …
- Sketch a profile the represents the cross-section of the coil feature.
- Use the Line command or Work Axis command to create an axis of revolution for the coil. …
- In the ribbon, click Finish Sketch.
How do you make a spring in AutoCAD?
- Click Content tab Calculation panel Springs drop-down Compression. …
- In the Select Compression Spring dialog box, select a Catalog or Standard.
- Select Front View or Sectional View.
- Click to specify the starting point.
- Click to specify the direction.
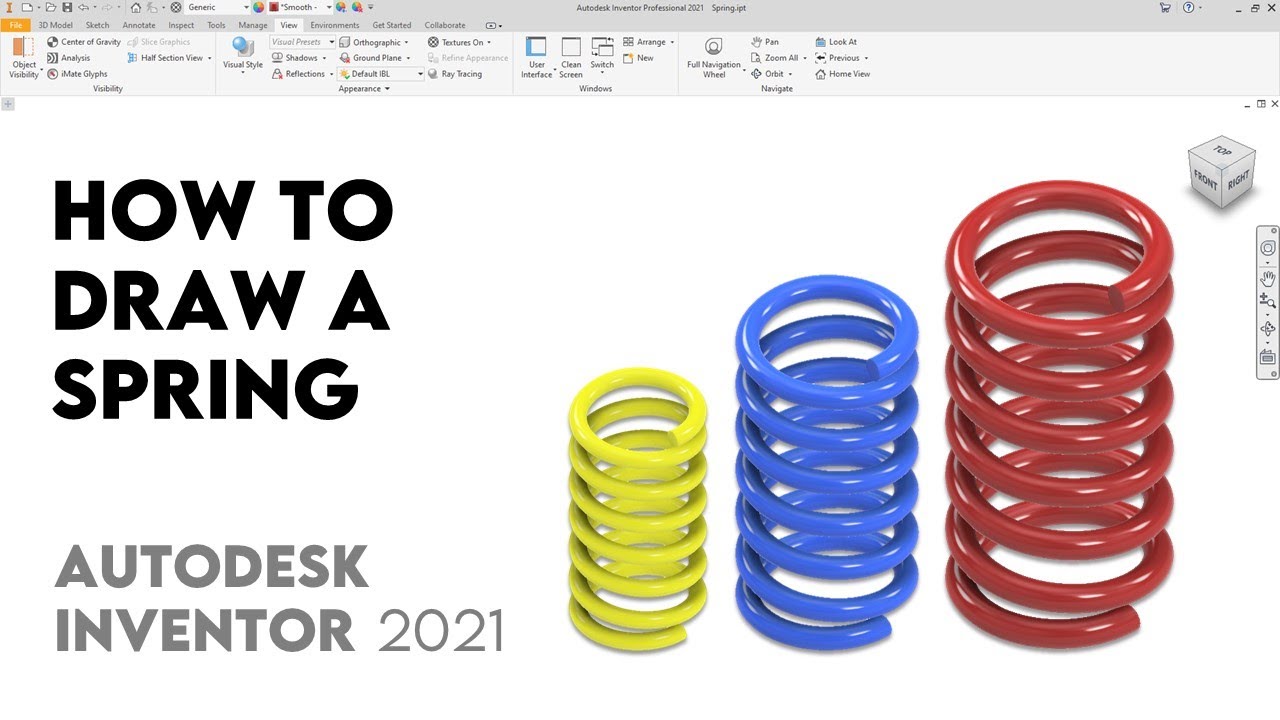
How to draw a Spring | Autodesk Inventor 2021 | Tutorial
Images related to the topicHow to draw a Spring | Autodesk Inventor 2021 | Tutorial
How do you make a spring in Inventor 2022?
- Select a part face or workplane for the sketch. …
- Sketch a profile the represents the cross-section of the coil feature.
- Use the Line command or Work Axis command to create an axis of revolution for the coil. …
- In the ribbon, click Finish Sketch.
How do you make coils in Autodesk Inventor?
- Click 3D Model tab Create panel Coil .
- Specify the profile and the axis of revolution.
- Under Operation, select Cut.
- On the Coil Size tab, use the Type menu to choose the two parameters you want to define, and enter values for the coil type.
How do you make a 3d spiral in Autocad?
- Click Home tab Draw panel Helix. Find.
- Specify the center point for the base of the helix.
- Specify the base radius.
- Specify the top radius or press Enter to specify the same value as the base radius.
- Specify the height of the helix.
Tension Spring CAD tutorial – [Autodesk Inventor 2021]
Images related to the topicTension Spring CAD tutorial – [Autodesk Inventor 2021]
![Tension Spring Cad Tutorial - [Autodesk Inventor 2021]](https://i.ytimg.com/vi/RHKNKqLf_kI/maxresdefault.jpg)
How do you make a spring in Solidworks?
- Step 1: Go through the diagram.
- Step 2: Draw a circle for spring. …
- Step 3: Drawing helix. …
- Step 4: Now will draw remaining sketches. …
- Step 5: Add new sketch. …
- Step 6: Draw sketch on other sides. …
- Step 7: Join sketch and helix. …
- Step 8: Join all the sketches.
How do you make a threaded rod in Inventor?
- Click 3D Model tab Modify panel Thread .
- In the graphics window, select a face for the thread location. …
- Set the Thread Length: …
- Click the Specification tab to set the thread type using predefined types from the Thread data spreadsheet: …
- Click OK.
Related searches
- inventor coil ends
- how to make a coil spring in inventor
- compression spring component generator inventor
- inventor curved coil
- who invented spring
- how to make spiral spring
- how to constrain a spring in inventor
- inventor spring
- how is a spring made
- inventor spring simulation
- adaptive spring inventor
- how to make a spring compress in inventor
- how to make a spring in inventor 2020
- how to make a spring in inventor 2021
Information related to the topic how to make a spring in inventor
Here are the search results of the thread how to make a spring in inventor from Bing. You can read more if you want.
You have just come across an article on the topic how to make a spring in inventor. If you found this article useful, please share it. Thank you very much.